Edit Drawing Objects
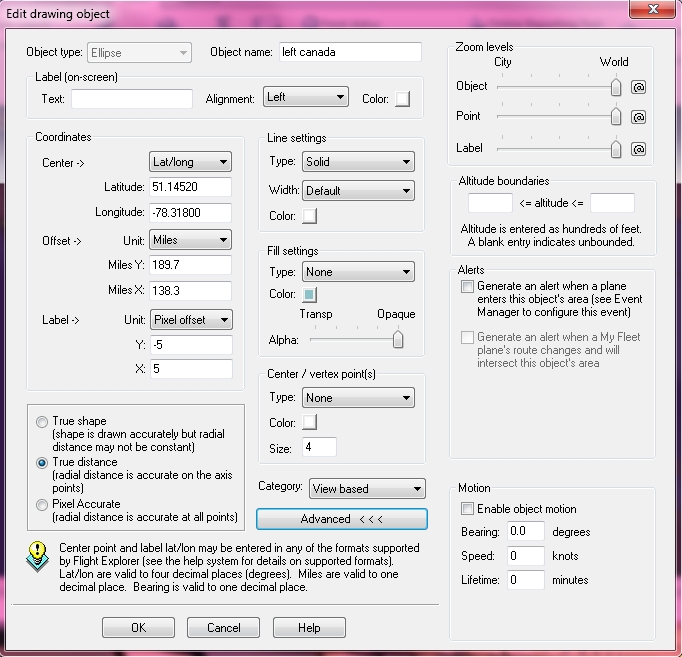
To open the Edit drawing object window
- In the Manage Drawing Objects window, click the name of the object from the list.
- You can also select the name in the list and then click Edit.
The Edit drawing object window appears.
The Edit drawing object window is similar to the Create drawing object window. The difference is that the Edit drawing object window appears with the information from the object already on the map.
![]() Click to see the Edit Drawing Objects page
Click to see the Edit Drawing Objects page
|
Item |
Description |
|---|---|
|
Object Type |
Select an Ellipse, Rectangle, or Polygon object type to draw in the specified location on the map. |
|
Object Name |
Enter the name of the object. |
|
Label (on-screen) |
|
|
Text |
Enter the text label to appear on-screen with the object. |
|
Alignment |
Select the alignment of the text label for the object. |
|
Color |
Select the color of the text label. |
|
Coordinates |
|
|
Start |
Enter the coordinates for the center point of the Drawing object. The center point can be based on Lat/Lon (a fixed geographical latitude and longitude coordinate) or Pixels (a fixed point on the map regardless of current zoom level or geographical viewing area). |
|
Offset |
Select the offset from the center point in both the x and y direction. Offset can be based on miles (see true shape / true distance below), or degrees. |
|
Label (optional) |
Choose to have the label displayed for the Drawing object. Display the label at a fixed pixel offset from the center of the object, a fixed Lat/Lon offset from the center of the object or a fixed pixel location on the screen (regardless of where the Drawing object is located). |
|
Line Settings |
Select the type, width, and color with which the object outline should be drawn. |
|
Fill Settings |
Select the type and color with which the object should be filled and select the transparency. |
|
Center / Vertex Point(s) (optional) |
Choose to have a marker displayed at the center/vertex point(s) of the Drawing object including the color and size. These points can be right-clicked to open a context menu. |
